

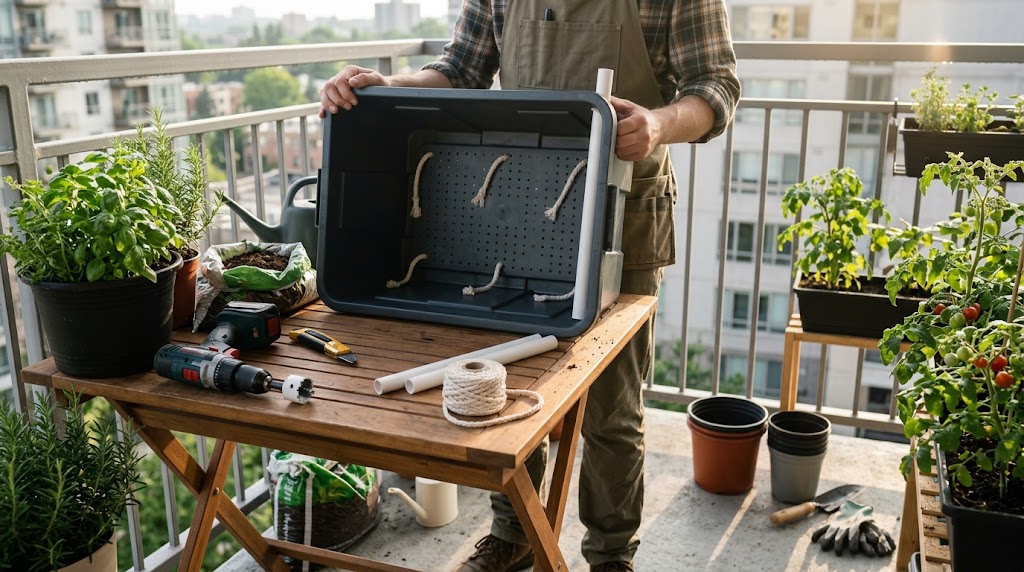
If you want to keep your potted plants consistently hydrated while saving money on expensive store-bought containers, trying the best diy self-watering planter hacks for balconies is an easy, high-impact weekend project.
When I first started container gardening in my high-rise apartment, watering became a constant daily chore. During scorching July heatwaves, my potted vegetables baked dry within hours. Commercial self-watering planters looked sleek in garden center catalogs, but buying four or five branded sub-irrigated pots quickly added up to hundreds of dollars.
That is when I began experimenting with homemade sub-irrigated planter (SIP) systems using everyday recycled materials. Using plastic storage totes, food-grade 5-gallon buckets, and discarded two-liter soda bottles, you can construct high-performance self-watering containers for a tiny fraction of the cost.
These homemade sub-irrigation setups feature an isolated subterranean water reservoir beneath an aeration screen. Capillary action draws water upward directly into the root zone whenever soil begins to dry, providing steady, uninterrupted moisture while completely eliminating surface evaporation.
According to container irrigation research from the University of Maryland Extension, sub-irrigated container systems reduce total water usage by up to 50 percent compared to top-watering, while delivering steady moisture that prevents common physiological disorders like blossom end rot in container vegetables.
Here is your complete, bookmark-worthy guide to the 10 best diy self-watering planter hacks for balconies.
Why DIY Self-Watering Planter Hacks for Balconies Work So Well
Balcony containers dry out rapidly because thin pot walls are exposed to solar radiation and breezy wind currents on all sides.
Adopting diy self-watering planter hacks for balconies creates an internal water reservoir that shields your plants against heatwaves, reduces your daily watering routine to once a week, and prevents nutrient runoff by keeping liquid fertilizer locked inside the closed container system.

10 Best DIY Self-Watering Planter Hacks for Balconies
Here are the top 10 homemade sub-irrigation builds tailored specifically for small apartment patios.
1. The Double-Decker 5-Gallon Bucket System
This is the classic DIY sub-irrigated planter design made from two nested food-grade 5-gallon buckets.
- How It Works: Drill dozens of 1/4-inch drainage holes and one central 4-inch hole in the bottom of the top bucket. Insert a perforated plastic deli cup filled with damp wicking soil into the center hole. Nest the top bucket into the bottom bucket, add a 3/4-inch PVC fill pipe down the side, and drill an overflow weep hole 3 inches from the bottom of the outer bucket.
- Why It Excels: Provides a generous 1.5-gallon water reservoir that keeps thirsty tomatoes, eggplants, and peppers hydrated for up to seven days.
2. The Heavy-Duty Storage Tote Sub-Irrigated Planter (SIP)
Repurposing an 18-gallon plastic storage tote creates a spacious, multi-plant growing bed on a budget.
- How It Works: Use a perforated corrugated plastic drain pipe or inverted plastic takeout containers at the bottom of the tote to create a 3-inch reservoir floor. Lay permeable landscape fabric over the reservoir, cut holes for soil wicking cups, and insert a vertical PVC fill tube.
- Why It Excels: Massive growing volume ideal for companion planting bush beans, kale, and strawberries in a single container.
3. Inverted 2-Liter Soda Bottle Seedling Planter
Perfect for compact herbs and leafy greens on small balcony bistro tables.
- How It Works: Cut a clean 2-liter soda bottle in half horizontally. Thread a thick braided cotton cord through a hole drilled in the plastic cap. Fill the bottom half with water, flip the top funnel section upside down into the base, and fill with potting mix.
- Why It Excels: Costs zero dollars and provides an automated desktop herb garden.
4. The Braided Cotton Rope Wicking Bucket
A simple, tool-free wicking hack that turns standard decorative ceramic pots into self-watering reservoirs.
- How It Works: Place a 1-gallon water container slightly elevated next to your decorative pot. Insert three strands of 100 percent natural cotton clothesline deep into the plant root ball, dropping the other weighted ends into the water reservoir.
- Learn More: Check out our full vacation watering tutorial in How to Water Balcony Plants While Away on Vacation.
5. Terracotta Pot with Inverted Glass Wine Bottle Spikes
A classic rustic wicking system that uses atmospheric vacuum physics.
- How It Works: Fill a clean wine bottle or glass soda bottle with water. Insert a commercially available or homemade unglazed terracotta watering stake into damp container soil and push the bottle neck into the spike opening.
- Why It Excels: Porous terracotta releases water only when surrounding soil particles dry out.
6. The Repurposed Styrofoam Shipping Cooler Planter
Insulated foam coolers from grocery or meal delivery boxes make exceptional summer planters.
- How It Works: Styrofoam walls provide thermal insulation that prevents reservoir water from overheating under scorching balcony sun. Install an overflow hole 2 inches from the bottom and an aeration grid.
- Why It Excels: Keeps container root zones 10 degrees cooler during August heatwaves.
7. PVC Pipe Underground Reservoir Trough
Ideal for rectangular wooden or metal balcony railing boxes.
- How It Works: Cap both ends of a 3-inch perforated PVC pipe, wrap it in landscape fabric, and lay it horizontally along the bottom of a rectangular trough planter. Attach an elbow joint and vertical fill pipe.
- Why It Excels: Distributes water evenly across the entire length of long railing boxes.
8. The Mason Jar Wicking Herb Garden
A sleek, modern windowsill or tabletop planter for small apartment balconies.
- How It Works: Insert a 3-inch plastic net pot into the mouth of a wide-mouth quart glass mason jar. Thread a cotton or microfiber wick from the net cup into the jar base.
- Why It Excels: Transparent glass lets you inspect exact water reservoir levels at a glance.
9. Upcycled Plastic Milk Jug Railing Planter
A budget-friendly vertical wicking container for renters.
- How It Works: Cut the top third off a 1-gallon plastic milk jug. Invert the funnel top into the bottom half with a felt wicking strip, and attach to balcony railing spindles with heavy-duty zip ties.
- Why It Excels: Lightweight and safe for high-rise apartment railings.
10. The Microfiber Cloth Capillary Mat Planter
Uses high-absorbency microfiber cloth to create an unbroken moisture distribution layer.
- How It Works: Line the bottom of a shallow planter box with a damp microfiber cloth, extending one end down into an underlying water tray. Set potted plants directly on top of the moist cloth.
- Why It Excels: Ideal for shallow-rooted microgreens and seedling trays.
DIY Self-Watering Planter Comparison Matrix
Use this reference table to select the best DIY planter build for your balcony space and target crops:
| DIY Planter Hack | Reservoir Capacity | Best Suited Crops | Build Difficulty | Estimated Material Cost |
|---|---|---|---|---|
| 5-Gallon Bucket SIP | 1.5 Gallons | Tomatoes, Peppers, Eggplants | ⭐⭐ Moderate | 6–10 |
| 18-Gallon Storage Tote | 3.5 Gallons | Bush Beans, Squash, Strawberries | ⭐⭐⭐ Advanced | 12–18 |
| 2-Liter Soda Bottle | 16 Ounces | Basil, Mint, Chives, Parsley | ⭐ Easy (10 Mins) | $0 (Recycled) |
| Cotton Cord Wick | 1–2 Gallons | Houseplants, Ferns, Salad Greens | ⭐ Easy (5 Mins) | 2–4 |
| Wine Bottle Spikes | 25 Ounces | Ornamental Flowers, Dwarf Shrubs | ⭐ Easy (5 Mins) | 3–5 |
| Styrofoam Cooler SIP | 2.0 Gallons | Heat-Sensitive Greens, Root Crops | ⭐⭐ Moderate | 0–5 |
| PVC Railing Trough | 1.0 Gallon | Railing Lettuce, Trailing Petunias | ⭐⭐⭐ Advanced | 8–12 |
| Mason Jar Wicker | 20 Ounces | Windowsill Thyme, Oregano, Cilantro | ⭐ Easy (10 Mins) | 1–3 |
| Milk Jug Railing Pot | 32 Ounces | Radishes, Baby Spinach, Scallions | ⭐ Easy (15 Mins) | $0 (Recycled) |
| Microfiber Mat Box | 1.0 Gallon | Seedling Trays, Microgreens | ⭐ Easy (15 Mins) | 3–6 |
How to Maintain and Troubleshoot DIY Self-Watering Planter Hacks for Balconies
To guarantee long-term gardening success without foul smells or root rot, follow these essential maintenance rules:
1. Always Drill an Overflow Weep Hole
Never build a sub-irrigated planter without an overflow drain hole! The overflow hole must be drilled through the outer wall just below the aeration floor. If a sudden summer rainstorm hits your balcony, excess water will drain out through the weep hole instead of flooding the soil and drowning root systems.
2. Use a Fluffy, Peat-Based Potting Mix
Sub-irrigated systems rely entirely on capillary wicking. Heavy garden topsoil or dense backyard dirt will compact into dense mud, suffocating roots. Use a light, porous blend composed of 50% peat moss or coco coir, 30% quality compost, and 20% perlite. Check our complete soil recipes in How to Prevent Container Soil Drying Out Fast.
3. Flush the Soil Once a Season
Because water wicks upward rather than draining downward, natural mineral salts from fertilizer can gradually accumulate near the soil surface. Once every three months, pour water thoroughly through the top of the soil until it flushes freely out the overflow hole to dissolve excess salts.
4. Cover the Water Fill Tube
Always place a loose cap or wine cork over the top opening of your vertical PVC fill pipe. Open pipes can become breeding grounds for mosquitoes.
Horticultural guidelines from the Royal Horticultural Society (RHS) emphasize that maintaining an air gap between the subterranean water reservoir and the soil floor is essential to supply roots with oxygen and prevent anaerobic root diseases.
If you prefer buying ready-to-use commercial options, compare our tested picks in the 10 Best Self-Watering Planters for Balcony Gardens.
For full automation setups, explore How to Build a DIY Balcony Irrigation System.
Recommended Related Reading 📚
To continue automating and upgrading your apartment patio on a budget, explore these related guides on our website:
- 🪴 10 Best Self-Watering Planters for Balcony Gardens – Top reservoir containers for hands-off gardening.
- 💧 How to Water Balcony Plants While Away on Vacation – Proven travel watering hacks and capillary wicks.
- 🛠️ How to Build a DIY Balcony Irrigation System – Build a clean automatic micro-drip watering setup step-by-step.
Frequently Asked Questions About DIY Self-Watering Planter Hacks for Balconies
Can DIY self-watering planters cause root rot?
No, as long as your build includes an overflow weep hole and an air gap between the reservoir and the soil grid. The aeration space ensures roots receive plenty of oxygen while wicking up only the moisture they need.
Do I need to water from the top when first planting?
Yes! When you first plant seeds or starter seedlings into a newly built DIY self-watering planter, water thoroughly from the top to moisten the entire soil column and establish the initial capillary wicking connection. After that, fill only via the reservoir tube.
How often do I need to refill a 5-gallon DIY self-watering bucket?
During mild spring and autumn weather, you will only need to refill the reservoir once every 7 to 10 days. During peak summer heat with mature fruiting tomatoes or peppers, refill every 3 to 4 days.
Final Thoughts
You don’t need to spend a fortune on high-end commercial planters to enjoy hands-free, automated gardening. By utilizing recycled 5-gallon buckets, storage totes, and cotton wicks, you can easily build diy self-watering planter hacks for balconies and enjoy thriving, drought-proof plants all summer long.
Make sure to bookmark this guide before your next weekend DIY project!
Which DIY self-watering build are you planning to construct for your balcony first? Share your questions and project ideas in the comments below!